How to Create a Shadow Theater: 5 Essential Rules You Need to Know
This article will definitely come in handy if you’re just starting to explore the genre of shadow theater. Useful tips will be for those who stage shadow theater performances at school or university, want to play with children in the shadows or try something new with friends. By the way, we have previously explained how to make a shadow theater at home.
When we were just starting our journey, we knew almost nothing about this genre. There were no books or manuals, and YouTube videos were very limited. Yet, in those videos, we only saw shadows on the screen. And how to start, what to take, where to stand, no word about it. Additionally, there are many different types of shadow theaters in the world. Therefore, the following highlighted rules are exclusively our experience and our vision of what is most important for working in the shadow.
On our YouTube channel of Shadow Theatre Verba, there is a video where in 8 minutes we tell you about the 5 basic rules of shadow theater and share life hacks that we use during rehearsals.
So, the main 5 rules of shadow theater.
Rule #1
The closer the object is to the light source, the larger it is. If you stand or hold an object right next to the projector (flashlight, lamp, or any other light source), it will be large, and most likely, it will not be visible on the screen at all. As you move away or move the object away from the light and approach the screen, you and the object will shrink.
Rule #2
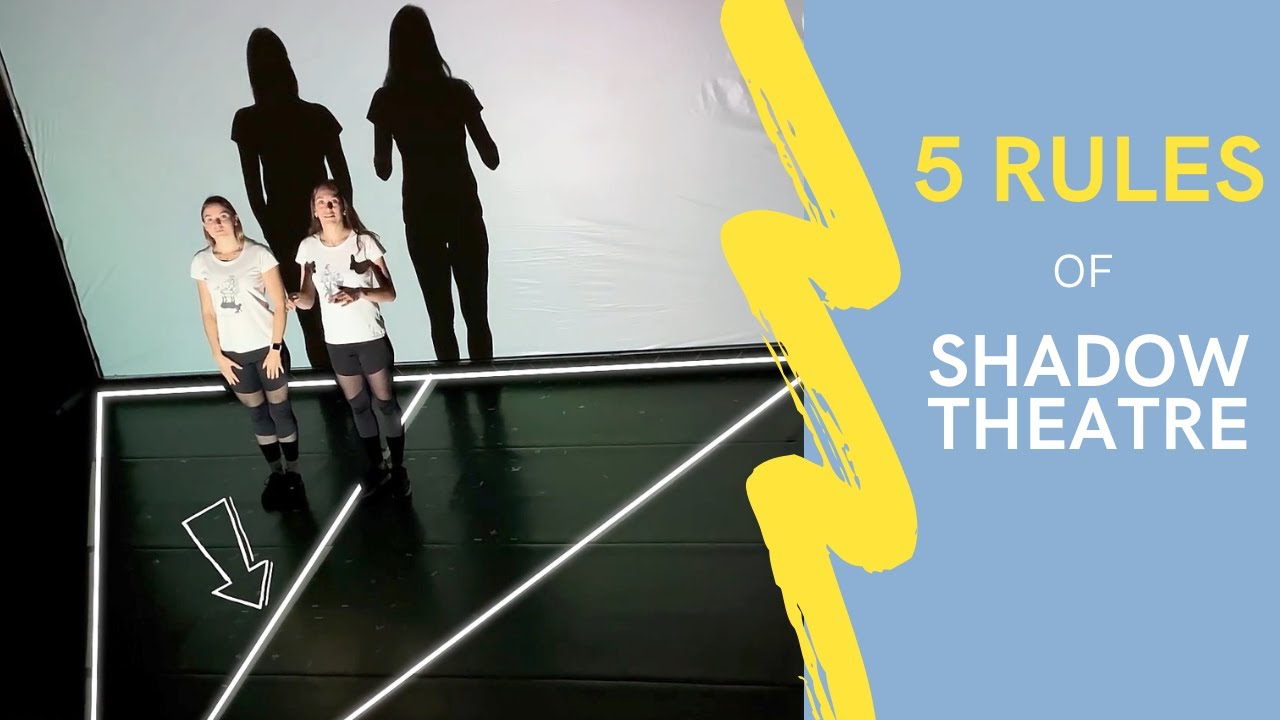
The working area between the screen and the light source forms a triangle. “Blind spots” are created on the sides, where you can simply wait for the figure to appear or prepare props.
We work on linoleum – a working surface for convenient movement, dance exits, and rolls. Also, on the side of the screen, as we mentioned earlier, there are “blind spots” where the light from the projector does not reach, here we wait for the exit or lay out our props for work. The “blind spot” near the projector is larger and decreases as you approach the screen. For convenience, we have drawn lines on the linoleum that show how the light falls and where to stand to be seen/not seen in the shadow. Therefore, even in the dark, we can navigate the space well.
Rule #3
An object can be hidden in its own or another shadow simply by changing the angle of inclination and its position in space. The shadow allows working with the 2D and 3D planes. We can make objects narrower, and change their shape, thanks to the physical laws of light propagation. In the shadow, you can even perform tricks by hiding parts of the body or props.
Rule #4
The blind spot exists not only on the sides of the light source but also below and above it. The amount of space in the “blind spot” below the light source depends on its height. We most often install the projector at a height of 40 cm from the floor. Then there is room to lie on the linoleum so that our shadow is not visible on the screen and wait for our turn in the performance. If the projector is on the floor, this effect will be impossible.
Rule #5
The position of the props relative to the light source greatly affects the shape of the shadow it will cast. If, for example, you hold the cardboard in the center of the linoleum, to keep it in the shadow flat and undistorted, you need to hold it parallel to the screen and perpendicular to the floor, without leaning forward or backward towards the projector. If the prop is used closer to the edge of the screen, it needs to be slightly rotated.
All of the above may sound complicated and not very understandable, so we highly recommend watching the video we have prepared on our YouTube channel. Also, you can always contact us directly for advice using social networks or email. If you start experimenting and trying on your own, you will be able to quickly master all the nuances of shadow theater. Good luck with your shadow experiments!